Getting started
- Introduction
- Know where to get help
- Use RCP for the right reasons
- Use the correct version of RCP
- Use the correct tools
- Set up a target platform
- Mirror Eclipse repositories
- Create a product configuration
- Define products with feature based dependencies
- Remove versions from product dependencies
- Always run code using a product configuration
- Get your product building right away
Putting it all together
In this Getting Started section I’ve tried to lay out how to put together the initial pieces of an RCP application. The last step is to create a build that can be incorporated into a continuous integration process. This should be done immediately when you start any new project, and the build should run every time a code change is checked in.
The details of setting up a Tycho build and a Hudson server are beyond the scope of this post, and I would suggest you check out the appropriate documentation to get started. What I can offer, though, is a set of sample projects that reflect the best practices I’ve discussed so far. You should be able to import these projects and get a Tycho build running fairly quickly.
The sample projects
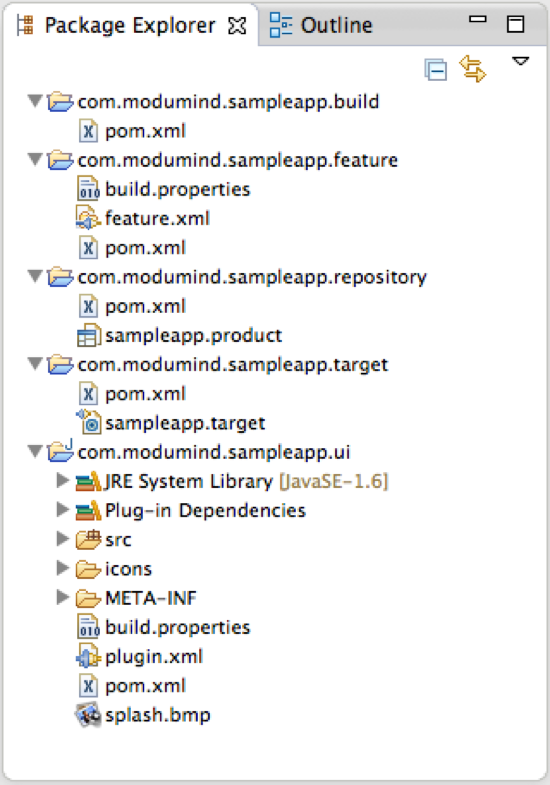
Below you see the sample projects that reflect the structure and naming conventions discussed in previous posts. Each project also contains a Maven POM that describes how the project should be built. By the way, these projects target Eclipse 3.8, but you could easily use the same approach to create an RCP 4 application.

Notice that the product configuration file lives in its own project ending in .repository. The POM in this project causes a p2 repository to be created during the build. There is also an additional request to materialize the product as an archive that could be extracted on an end-user’s machine. This addition step is optional, as we often want to simply generate a p2 repository during the build.
Running the build
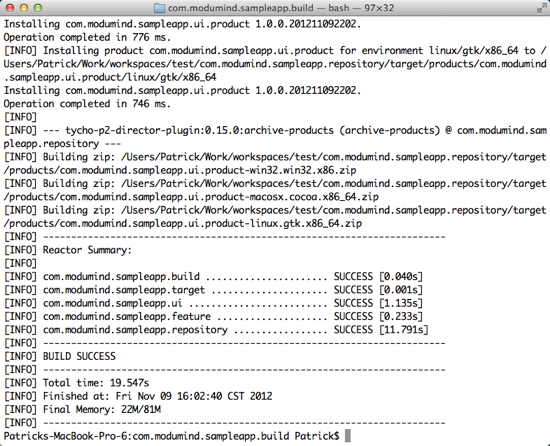
After installing Maven 3, you can open a terminal and navigate to the com.modumind.sampleapp.build folder in your workspace. This project contains the parent POM that launches the build. Run a mvm clean package command and you should see the following output indicating that the build ran successfully.

Examining the results
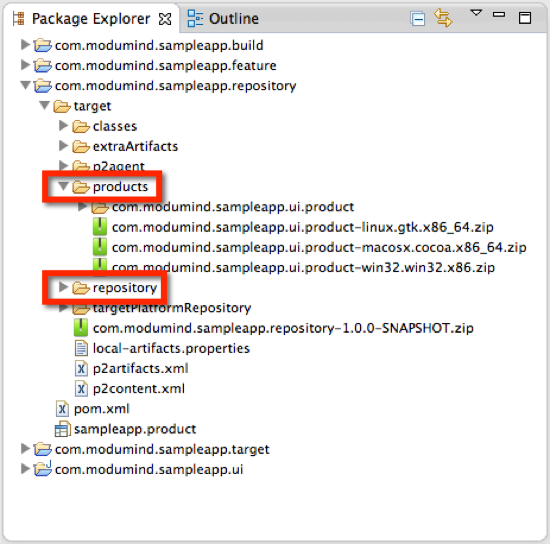
After the build runs, refresh the com.modumind.simpleapp.repository project. The build has created a target folder containing the build output. The repository subfolder contains a p2 repository and the products folder contains materialized archives.

In a continuous integration process, the repository could be copied to a server and made available to end-users or other developers creating downstream features.
Final thoughts
I hope you find the sample projects useful in creating new RCP applications or refactoring old ones. I’m also hoping that these projects will convince you to set up a continuous build using Tycho and Hudson, if you have not done this already. There are so many moving pieces in an RCP application that a continuous build is essential to finding problems as soon as they are introduced.
