Adding logging to an RCP application has always been painful. Developers have struggled with the best way to incorporate Log4J and other logging APIs, and in particular with how to make configuration files accessible. Some have chosen to use buddy classloading, others have utilized fragments containing the config files.
Pax Logging to the rescue
I’m happy to say that RCP developers now have another choice – Pax Logging. There are a few great things about this library:
- Installation is easy. I’ll describe this in a bit.
- Configuration files can be placed in regular folders, either inside of an application bundle or anywhere on a users machine.
- Many logging APIs are supported, including Log4J, Commons Logging, JDK Logging, SLF4J and more. This means that legacy and third-party code can run as-is no matter what logging API they use.
Logging configuration with Pax ConfMan
Because Pax Logging requires the OSGi Configuration Admin service to work, your first step is to install this service in the form of Pax ConfMan. In my last blog post I provided detailed instructions on how to do this.
Adding configuration settings
The good news is that once you install Pax ConfMan, you’re almost done! Pax ConfMan requires the Pax Logging bundles in order to work, so we only have a few minor steps left.
The first is to add a logging configuration file. When using the OSGi Configuration Admin service, services are identified using a persistent identifier, or PID. Developers can choose the PIDs for their own services, and an implementation of the Config Admin uses these PIDs to inject properties into services.
Pax ConfMan does this by requiring that a properties file be named based on the PID of the service it is going to configure. For example, the Pax Logging PID is org.ops4j.pax.logging and so the properties file for this service will be called org.ops4j.pax.logging.properties.
If you created the folder structure suggested in the Pax ConfMan setup, simply create a file called org.ops4j.pax.logging.properties in the confadmin/services directory. You can now place whatever logging configuration you like into this file. For instance, here’s what I have for my simple test project:
log4j.rootLogger=DEBUG, A1
log4j.appender.A1=org.apache.log4j.ConsoleAppender

log4j.appender.A1.layout=org.apache.log4j.PatternLayout

log4j.appender.A1.layout.ConversionPattern=%-4r [%t] %-5p %c %x - %m%n
log4j.logger.com.rcpquickstart.logtest=DEBUG
Forcing Pax Logging to start
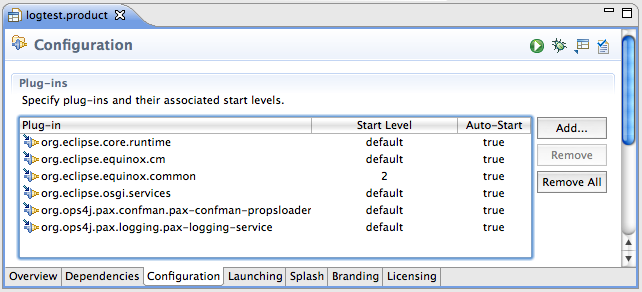
Just as we did with Pax ConfMan, its necessary to force Pax Logging to start up when our application is launched. To do this, we simply need add the org.ops4j.pax.logging.pax-logging-service bundle to the Configuration page of the Product Configuration Editor and set it’s Auto-Start property to true. If you’ve followed the instructions for installing Pax ConfMan, your complete list should look like this:

Fire it up
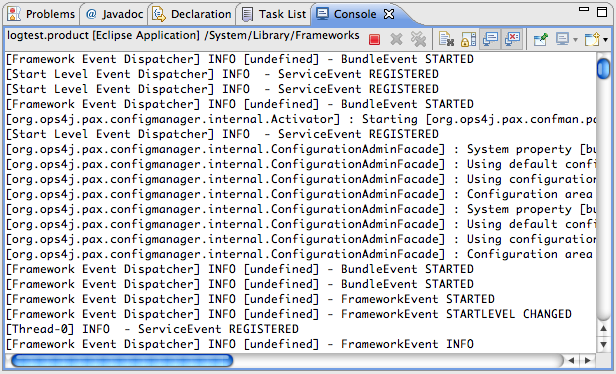
That’s all there is to it. Start up your RCP application and you should see log messages appear in your console.

Happy logging!
