The Commons Navigator Framework is one of the more complex parts of the Eclipse API. It can be difficult to get started with the framework, and one of the hardest parts is simply getting a basic navigator to appear with custom content. This tutorial is designed to get you to that point so that you can start exploring the framework on your own.
There are quite a few steps, but it’s not as bad as it looks. So let’s get started!
- Before creating a navigator, it’s first necessary to have something to place it in. If you don’t have an existing RCP application to work with, create a new one using the “Hello RCP” template. Also, if you have a custom target platform, you’ll need to add the
org.eclipse.ui.navigatorplug-in to that target. Finally, you’ll need to add the navigator plug-in as a dependency in the appropriate manifest.
- Now that the preparations are out of the way, we can create the navigator itself. Because CNF navigators are also regular views, the first step is to create an
org.eclipse.ui.viewsextension. Enter in an appropriateidandname, and then enter a new class name in theclassfield. Note that this is where we diverge from standard CNF usage. Normally we would simply enter theorg.eclipse.ui.navigator.CommonNavigatorclass in this field. To learn why we are not, check out my previous post on the subject.
- Click on the
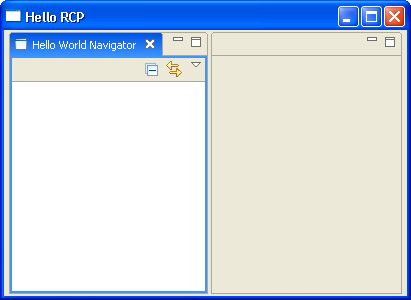
classfield label to launch the New Java Class wizard. Change the superclass toorg.eclipse.ui.navigator.CommonNavigatorand clickFinish. We now have our main navigator class, and we’ll return to it a little later. You can now also add your view to a perspective either programmatically or through a perspective extension. At this point, you should be able to run your application and see an empty navigator appear.
- Now for some content. Create a
NavigatorRootclass that will serve as the root node in your navigator. Note that this element will not appear in the navigator, the children of the root node will be the first to appear. The class representing the navigator root must be anIAdaptable, and the simplest way to accomplish this is to have yourNavigatorRootextend thePlatformObjectclass. Also create another simple bean calledParentBeanthat has anameattribute. Finally, add agetParentBeansmethod to yourNavigatorRootclass and have that method return a set of populatedParentBeaninstances.
- The navigator root can now be added to the navigator class we created above. In that class, override the
getInitialInputmethod and simply return a new instance ofNavigatorRoot. Note that in a real-world implementation, the navigator root would probably be a singleton or returned by a factory class. Also note that these few lines of code are all that are required in the navigator subclass. While subclassing the CNF navigator is not ideal, this approach is far from risky.
- The next step is to declare an
org.eclipse.ui.navigator.navigatorContentextension. This extension point is used to define many navigator elements, including content (of course), filters and actions. It’s important to understand that this extension point defines content in a navigator independent way. You will later need to bind this content to a specific navigator to get the content to appear. So create this extension and add anavigatorContentelement below it. Choose an appropriateidandname, and then enter class names for thecontentProviderandlabelProviderfields.
- Click on the
contentProviderandlabelProviderfield labels to create the required providers. The content provider should take in aNavigatorRootas input and return an array ofParentBeaninstances as children. The label provider should simply return the name of theParentBeanas the display text.
- We now need to specify what will cause our content to appear. The simplest way to do this is to specify what type of parent element should trigger our content and cause our content/label providers to be called. In our example, we’ll add a
triggerPointselement below thenavigatorContentelement. UndertriggerPoints, we’ll add aninstanceofelement and then enter yourNavigatorRootclass in thevaluefield. This will cause your content to be added whenever aNavigatorRootinstance is encountered in the tree.
- The final step (we’re almost there!) is to bind the content to the navigator. To do that, we need to declare an
org.eclipse.ui.navigator.viewerextension. This extension point registers our view as a navigator and allows us to bind different types of content to it. Create the extension and first add aviewerelement to it. Enter the id of your view in theviewerIdfield. Now add aviewerContentBindingelement below the extension. This element is what actually adds our content into the navigator. Again, enter your view id into theviewerIdfield. Add anincludeselement below theviewerContentBindingand then acontentExtensionelement below that. Finally, in thepatternfield of thecontentExtensionelement, enter the id of your navigator content.
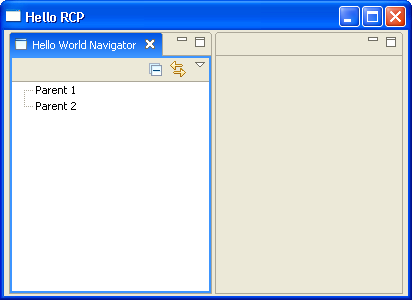
You should now be able to run your application and see content appear in the navigator!
As you can see, even the simplest CNF example requires a fair number of steps to get working. It’s also rare for the navigator to appear correctly on the first try, and it can be extremely frustrating to debug the CNF when things go wrong. So much of the CNF is wired using extension points that any small typo can cause you a lot of grief. For that reason, I recommend that when working with the CNF you make small, incremental changes and verify functionality after each change.
Because it can be a real pain to get all the linkages working the first time, I’ve created some sample code (Eclipse 3.2, Eclipse 3.3) that will get you up to speed more quickly. Good luck!